FAQ's
Where do I get chickens?
There are many places to buy chickens. Commercial hatcheries, local farms or breeders. Your local cooperative extension is also a good resource. We are happy to help advise you on what type of chickens are appropriate for your needs.
|
How long will my chickens live?
A chicken can live for five years or more. We have had some very healthy ten year old hens. They do stop laying after about 4 years usually, but by then they are well loved, full of personality, and well-respected members of the flock.
|
How can I learn more about my birds?
You can of course study up on chickens in all the usual ways. Books, magazines, as well as visits to farms and poultry shows will all help. The best thing is to get to know your birds. Familiarize yourself with each bird and its behavior. When you know their habits, you will know when a bird is behaving differently, which is usually a sign that something is wrong. Feel free to call us at the Frontyard Coop for advice!
|
Do I need a rooster to get eggs?
No, a hen is an egg laying machine all by herself. You do not need a rooster at all.
|
When do I get eggs?
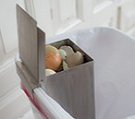
A pullet (a young hen) will lay her first egg when she is roughly 4-6 months depending on the breed and the hen herself. Then a good layer will lay one egg a day--never any more. Many hens will lay only about 4-5 eggs a week. If you have a good, reliable laying hen who stops laying and stays in her nesting box, she may be "broody". See our helpful hints download for information on this a other common health issues.
|
What do I do when I bring them home?
Many of you will be receiving chicks from commercial hatchery. Your cardboard box will arrive full of peeping chicks barely 36 hours old. Chicks have enough nutrition remaining from their yolk sac to last a good while, but they need water and warmth immediately. Be prepared. We have learned that it is best to begin preparing for the chicks a few days before they arrive so their new home is ready for them immediately. Buy a 250 watt heat bulb, preferably red light. Hang it 18 inches from the floor of their space, which should be either a large box or an escape-proof floor space. Make sure your box is sufficiently large so the chicks have room to get away from the heat if they need to. Cover the bottom of their area with newspaper, which you will change daily for the first 3 or 4 days. (After that, you can use bedding for the chicks instead of paper. Ask your local feed store for bedding appropriate to baby chicks.) It can be tricky to get your light at exactly the right distance and brightness to maintain its initial temperature. A lamp with a dimmer is great for this, as it can be lowered gradually. Remember that your chicks have come from a 100 degree environment and need to be gently weaned or “hardened” to lower temperatures over time. The initial temperature should be 90 to 95 degrees for the first week. The temperature under the light will be higher than this, but your chicks will find a spot that is right for them. Reduce the temperature by 5 degrees per week until you get to 70. They shouldn’t need any additional heat after that. Be sure to use an accurate thermometer in your box, and keep your chicks away from drafts. If they are all huddled together directly under the light, they are cold. If they area huddled in a corner away from the light, they are probably hot.
|
Special Notes:
Before your chicks arrive, read up on them. Many websites that sell chicks offer great books on the subject. Occasionally a chick’s rear end gets pasted up with manure. Gently wash this with warm water and check to be sure that it stops after a couple of days. Be sure that you and your children ALWAYS wash your hands after handling birds, their equipment, bedding, etc. DO NOT kiss them, or put your mouths anywhere near them, and do not keep them inside. Make sure to enjoy while they’re at this phase! Happy hatchlings are active (eating and drinking and making noise) and are very entertaining. Sometimes they will fall asleep by falling flat onto their faces, and sometimes they sleep in fuzzy yellow piles. Either way, chick-watching can provide hours of entertainment.
|
Water:
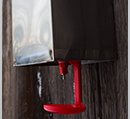
Have a gallon of water per 50 chicks. For the first two days, you can add 3 teaspoons of sugar to each quart of water for extra energy. Plain water should be given thereafter. As soon as your chicks arrive home, they will be thirsty. Take each chick’s beak and dip it in the water. Never let your chicks run out of water. Make sure your waterers are on the shallow side to avoid drowning; these little guys are weak and vulnerable. We have had babies drown in waterers that were too deep.
|
What do I feed them?
Food: Buy a commercial chick starter to use for the first two months. Starter is usually medicated, which is very important. Also important, though, is that only your baby chicks get it. If you are also raising ducklings, be sure you do not give medicated feed to them. Your local feed store should have this or be able to order it for you. Sprinkle it on the newspaper for the first 3 days. Be sure to change the newspapers the whole time. After this, put the feed in a low trough or container that the chicks can and see and reach easily. We usually give new chicks some finely chopped scrambled eggs for the first week or so in addition to starter crumbles. It is good protein and easy for them to eat. Make sure all of them are getting food and water; if you notice anyone having a difficult time, separate them and be sure to hand feed if possible. If you spend time watching your babies, it should be clear to you if there are any that are not doing well.
|
I want to add a bird or two to my flock. Will they be friends?
We often buy pullets or full grown hens. Some care should be taken to integrate them into an existing flock. We like to start out by placing the new chicken in a separate cage next to or within the larger flocks larger pen or coop. This eliminates the abrupt newness factor. After a couple of days, we introduce the bird to the flock under our supervision. New members of a backyard flock will generally have to bear up to an assault or two as both new birds and old establish dominance. It is what animals do, and it needs to be done, but be sure you don’t lose anyone in the process. This greet/attack phase can go on for a few hours, so give the new chicken some room to run. At this stage you not leave them alone for long, and certainly not overnight in the same coop. Over time a new bird will become a full-fledged member of the flock with its rightful place in the pecking order, and peace will reign again.
|
What do we do in the winter?
Having spent the summer taking our FYC to farmer’s markets, backyard chicken workshops, green expos, sustainability fairs and other wonderful events, I can now reliably predict the first question most people will ask about raising chickens. Everyone asks what to do with their poultry in the winter. The simple answer is “nothing”. By that I mean, almost nothing. Poultry come pretty well insulated. They wear their down coat 24/7, and in fact it is bad for their health to live in a heated coop. They don’t have a chance to acclimate to the cold if they live in a heated environment. They should have decent air circulation in their coop even during the winter, to keep out dampness as well. Insulating your coop is fine, just don’t add any heat. Chickens can be prone to respiratory ailments, so be conscious of any sneezing or wheezing you hear and isolate and medicate any suspicious characters. Many poultry owners find that a bit of additional cracked corn to a chicken’s winter diet adds a bit of insulating fat, and increases the btu’s that a chicken normally puts out. The most important thing for a chicken in the winter is to have fresh, un-frozen drinking water. An immersion coil works great, as does an actual heated waterer. Both are easily found at feed stores. Some folks who live in areas of extreme cold find that giving their birds heated water helps them get through really tough times as it is effort free warmth on the inside. Frostbite is a danger for your birds’ combs and wattles, especially those with single combs or any of the more upright types of combs. A simple preventive measure is to rub Vaseline liberally into your birds comb and wattles if you know a bad cold spell is due. The birds actually enjoy this, and the improved circulation is an added protection from the cold. We have never lost a bird to winter cold, although we have lost them to summertime heat stress. Monitor your flock, keep their water from freezing, shovel away some snow for their tender little feet, and they should be fine. Ever notice how they love to snuggle up when they roost at night? The Front Yard Coop makes it easy to move your flock close to your house during the winter months. If possible, position your FYC on the south or east side of your house to protect it from westerly winds. You can also run an extension cord into the coop for immersion coils or other water heaters. If you can get your coop really close, you can check on them easily and replace their water as needed. Frozen chicken poop is no picnic, but if you are close enough to the house, you can throw some buckets of hot water on the run area periodically, or just cover it with hay that you keep clean. Hay is also a better bedding for the winter months as it insulates and retains warmth more than pine shavings. That should do it.
|
-Coops-
How many chickens will your coop hold?
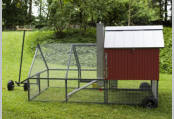
It depends on the breed of the bird but in a general sense you can fit 8-10 birds.
|
What is the cost?
$2,250 per unit
|
What method of payment do you accept?
We accept payment via Paypal, which accepts a majority of cards and payment options.
|
What is the wait time before I receive my coop?
We require 15 business day to process orders, assemble coops, and prepare for transport to your location. This does not include shipping.
|
|


